A split seam does not mean the garment is finished. Most seam failures are the stitching letting go, not the fabric failing, and stitching is the easiest part of a garment to rebuild by hand. With a needle, thread, and about ten minutes, you can close a burst side seam, a popped shoulder, or a torn lining so the repair holds through washing and wear.
The one qualification: hand repair works best when the fabric itself is intact. If the cloth is torn, fraying badly, or the seam runs through a stress point like an armhole on a lined jacket, a professional alteration is the safer spend. Everything below covers the common case — a clean split along an existing stitch line.
This guide sits with our other tutorials on keeping clothes in service longer, from storage to stain care. Repair is the same skill in a different direction: less a craft project than basic maintenance.
What tools do you actually need?
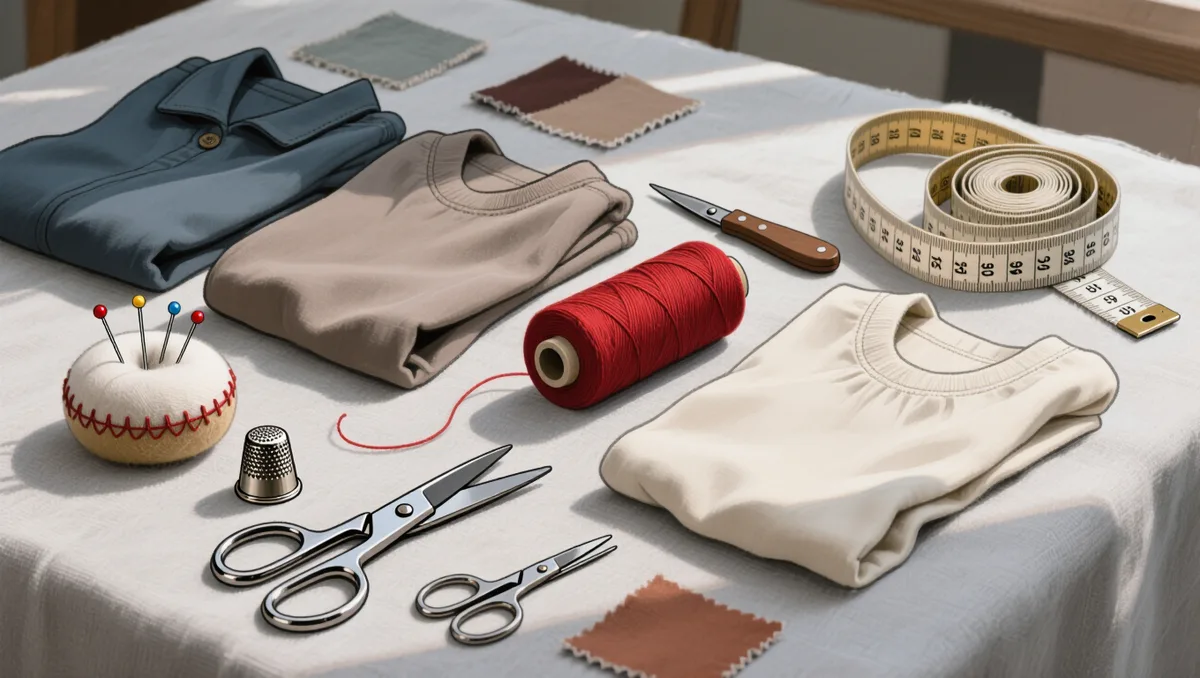
Three things: a hand-sewing needle, thread, and scissors. Everything else is optional. A needle labeled for general purpose or embroidery works for most fabrics; finer needles for sheer or delicate cloth, sturdier ones for denim and canvas. Choose thread in a matching color, or slightly darker — a darker thread disappears into a seam more readily than a lighter one.
Useful but not required: pins to hold the seam closed, small scissors or snips, and a thimble if you are sewing through heavy fabric. A seam ripper helps if you need to open a bit of the old stitching to reach the tear, but careful scissors work too.
If the garment came with a spare swatch in the pocket or a repair kit, use that thread. It was dyed to match.
How do you close a simple split seam?
Work in this order. Each step takes a minute or two.
- Turn the garment inside out. You will sew from the wrong side, which hides your work and puts the knot where it cannot be seen.
- Close the gap with pins. Bring the two original seam lines back together, right sides facing, so the seam sits exactly where it did before. Pin perpendicular to the opening.
- Knot your thread. Cut roughly an arm's length of thread — about 18 inches — thread the needle, and knot one end. Doubled thread makes the repair stronger on medium and heavy fabrics; single thread suits anything delicate.
- Anchor the stitch. Insert the needle through the existing seam stitching just past one end of the split, and pull until the knot sits against the fabric. Starting inside the old stitching ties your new work into the original seam.
- Sew along the old stitch line. A small backstitch is the strongest hand stitch for this. Take a short stitch backward, then bring the needle up slightly ahead of where the thread last exited, so each stitch overlaps the previous one. Keep stitches small and even — roughly the length of a grain of rice.
- Reinforce the ends. When you reach the far end of the split, sew a few extra stitches into the intact seam beyond it. Seams usually fail at their ends first, so extending the repair past the tear prevents the next split.
- Knot off and finish. On the wrong side, make two small stitches in place, pass the needle through the loop, and pull to form a knot. Snip the thread close.
Press the seam flat with an iron on the fabric's recommended setting if the material tolerates heat. That last step makes the repair nearly invisible from the outside.
What changes with fabric weight?
Lightweight fabrics — silk, chiffon, fine cotton: use a fine needle and single thread. Keep stitches very small, and avoid pulling tight, which puckers the cloth. If the fabric frays at the raw edges, a tiny dab of fray-check product along the edge before sewing keeps the repair clean.
Medium weights — most shirting, trousers, jersey: the standard method above works as written. Doubled thread adds durability on seams that take strain, like side seams and seat seams.
Heavy fabrics — denim, canvas, outerwear: use a sturdier needle and doubled thread, and expect to push the needle with a thimble or the back of it. Take slightly larger backstitches; tiny stitches in thick cloth tend to skip. Where the seam crosses multiple layers, sew only through what the original seam joined.
Knits need their own note. A rigid backstitch can make a knit seam snap again the first time it stretches. Instead, use a loose chain of small stitches with some slack built in, or a stretch stitch: one forward stitch, then a tiny backstitch, repeated. Leave the seam slightly relaxed rather than pulled taut.
What if the fabric is torn, not just unstitched?
A clean seam split leaves both edges intact. A tear in the fabric is different, and the fix depends on size and location.
For a small tear in a low-stress area, you can close it with tiny stitches and a patch on the wrong side. Cut a fabric scrap slightly larger than the tear, pin it behind the hole, and stitch the torn edges to the patch with fine stitches. Iron-on mending tape is a no-sew alternative for cottons and denims; follow the product's own instructions for heat and time.
For a tear at a stress point — a crotch seam, an underarm, the corner of a pocket — hand repair rarely lasts. These areas flex hard and constantly. A patch-and-darn job will likely split again within a few wears.
When should you hand it to a professional?
Hand the garment over when the repair needs equipment or judgment you do not have yet. The clear cases:
- Tears or seam failures at high-stress points like crotch seams and armholes.
- Damage in structured or lined garments — a blazer shoulder, a lined coat — where opening the lining is part of the job.
- Delicate or expensive fabrics, silk and wool suits especially, where a visible repair costs more than the alteration.
- Any tear where the fabric itself is failing across a wide area, not just along one line.
- Leather and heavily interfaced pieces, which need industrial machines.
Alterations shops exist precisely for this, and their rates for a seam repair are usually modest relative to replacing the garment. If you already own the needle and thread, everything above costs nothing but time — which is the honest reason to try it first on the straightforward cases.
What this means for your wardrobe
Seam repair is the cheapest way to extend a garment's life, and it stacks with the other habits in this archive. Mending a seam the week it splits stops a small failure from becoming a big one — a popped seam left alone tends to unravel further each time it is worn and washed. Pair the habit with proper storage, like the method in How to Store Sweaters So They Keep Their Shape, and garments stop failing in the first place as often as they used to.
It also changes how you shop. A garment with clean finished seams and generous seam allowances is repairable; one with skimpy, serged-only seams is not. That is a useful check before buying, and it fits neatly into the evaluation we set out in How to Build a 30-Piece Capsule Wardrobe: The Algorithm. Build the kit once, keep it in a drawer, and the next split seam becomes a ten-minute errand instead of a decision.